Last Updated 4/11/2025
CU Involved Forms
Log in to CU Involved.
Go to your organization’s CU Involved page
Click on Manage Organization on the upper right side of page
Click on the three black bars on the upper left side of the page
Click on Forms
Click Create Form at the top of the page.
When creating a form, you will first be prompted to identify your form properties. Enter a name for your form and then fill out the additional settings. See below for an explanation of each setting.

After you determine the settings for your form, you’ll be taken to the form builder, and you will land on the first page of your form. At any time, you can jump back into the settings by clicking Form Properties in the top right of the page. In addition, you can jump to additional pages of the form by clicking Page List in the top left. To name the page, click Page Properties in the top right. The name of each page will be visible to users filling out the form.
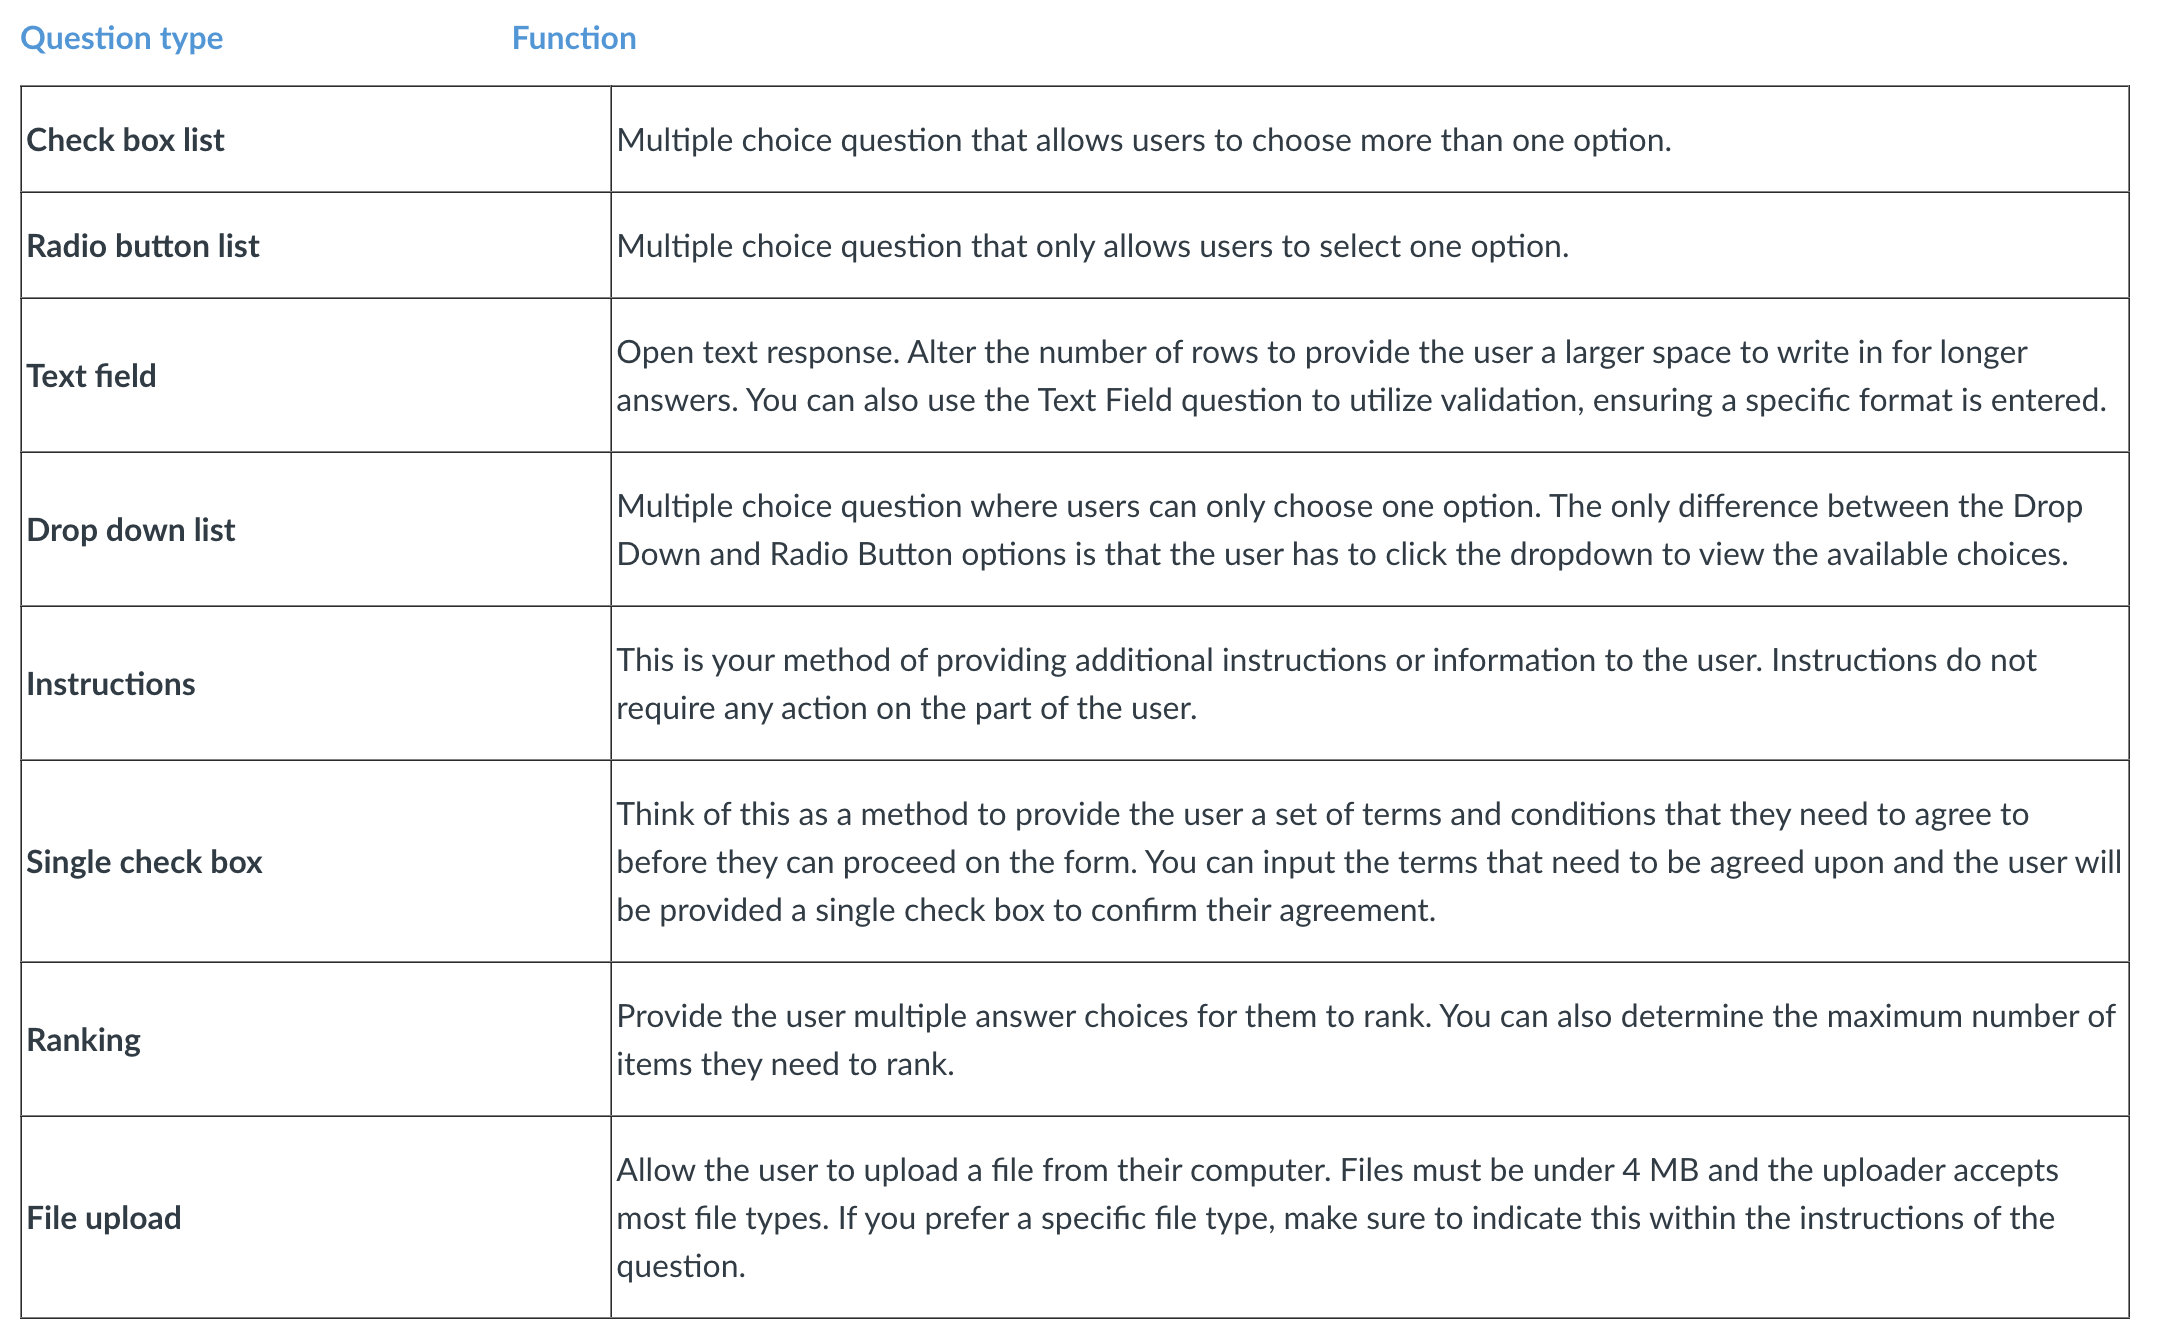
When you’re ready to start adding questions into the form, take a look at the list of question types that are available to you. Each of these question types serve a unique purpose. See below for a complete explanation of each.
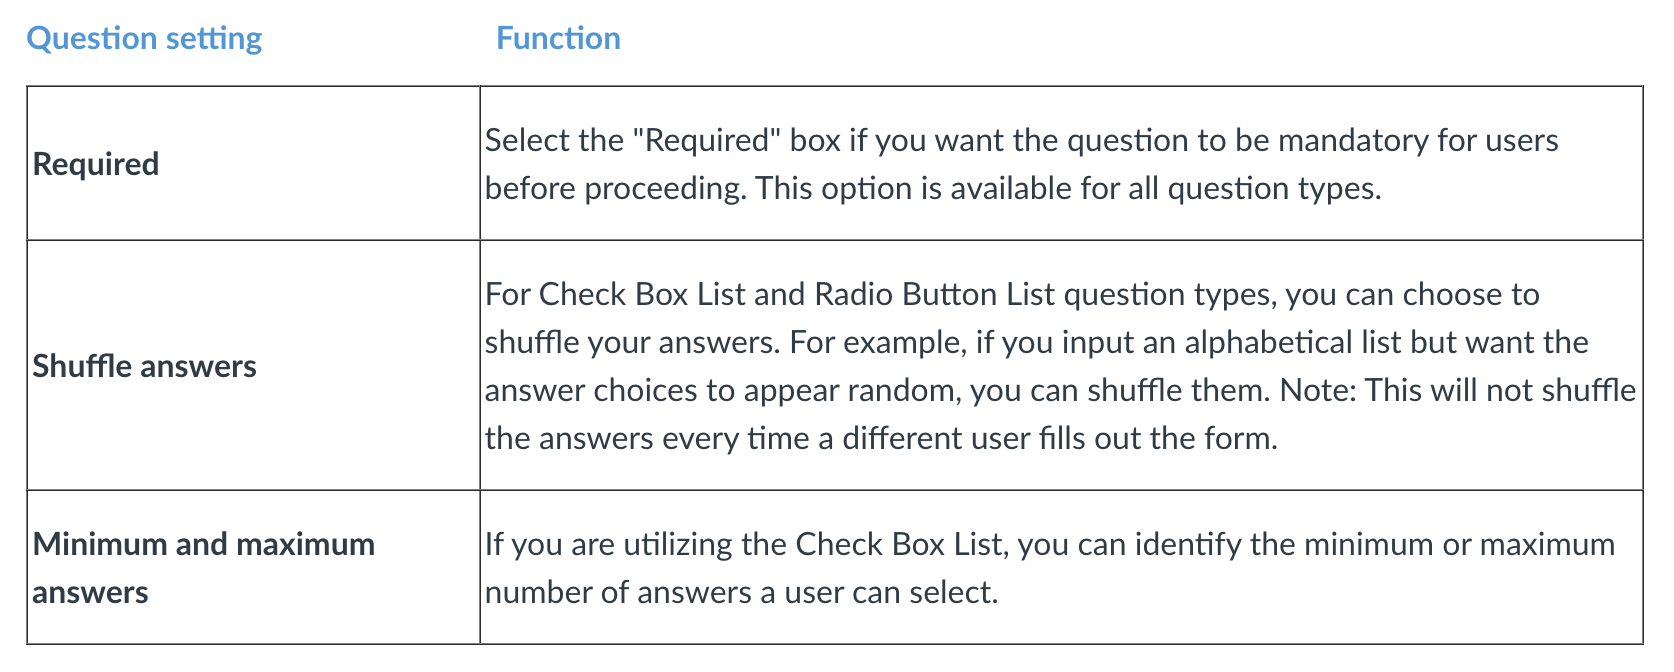
For each of the question types, you also have additional question options. Once you have created a question, click on the blue Edit icon within the question to view its additional options. Potential options and their descriptions are below.

You also have the ability to put additional properties on your answer choices for Check Box List, Radio Buttons and Ranking question types.
After creating the form and configuring the settings, you’re ready to publish. Navigate back to your full list of forms. To the right of your form you will see the Publish option. Make sure your form is Active and copy the URL provided in the text box. You’ll need to click Publish Form if you changed the status. Next, distribute the form link to whomever should complete it.
CU Involved for Elections
Organization officers have the ability to create elections within their organizations, either for the entire community to vote on, or exclusive to organization members. Please be sure your organization membership page is up to date before proceeding. To create an organization-based election, follow the instructions below.
Log on to CU InvolvedLinks to an external site.
Go to your club/organization's CU Involved page
Click Manage Organization on the upper right side of the page
Click on the three black bars on the upper left side of the page
Click Elections
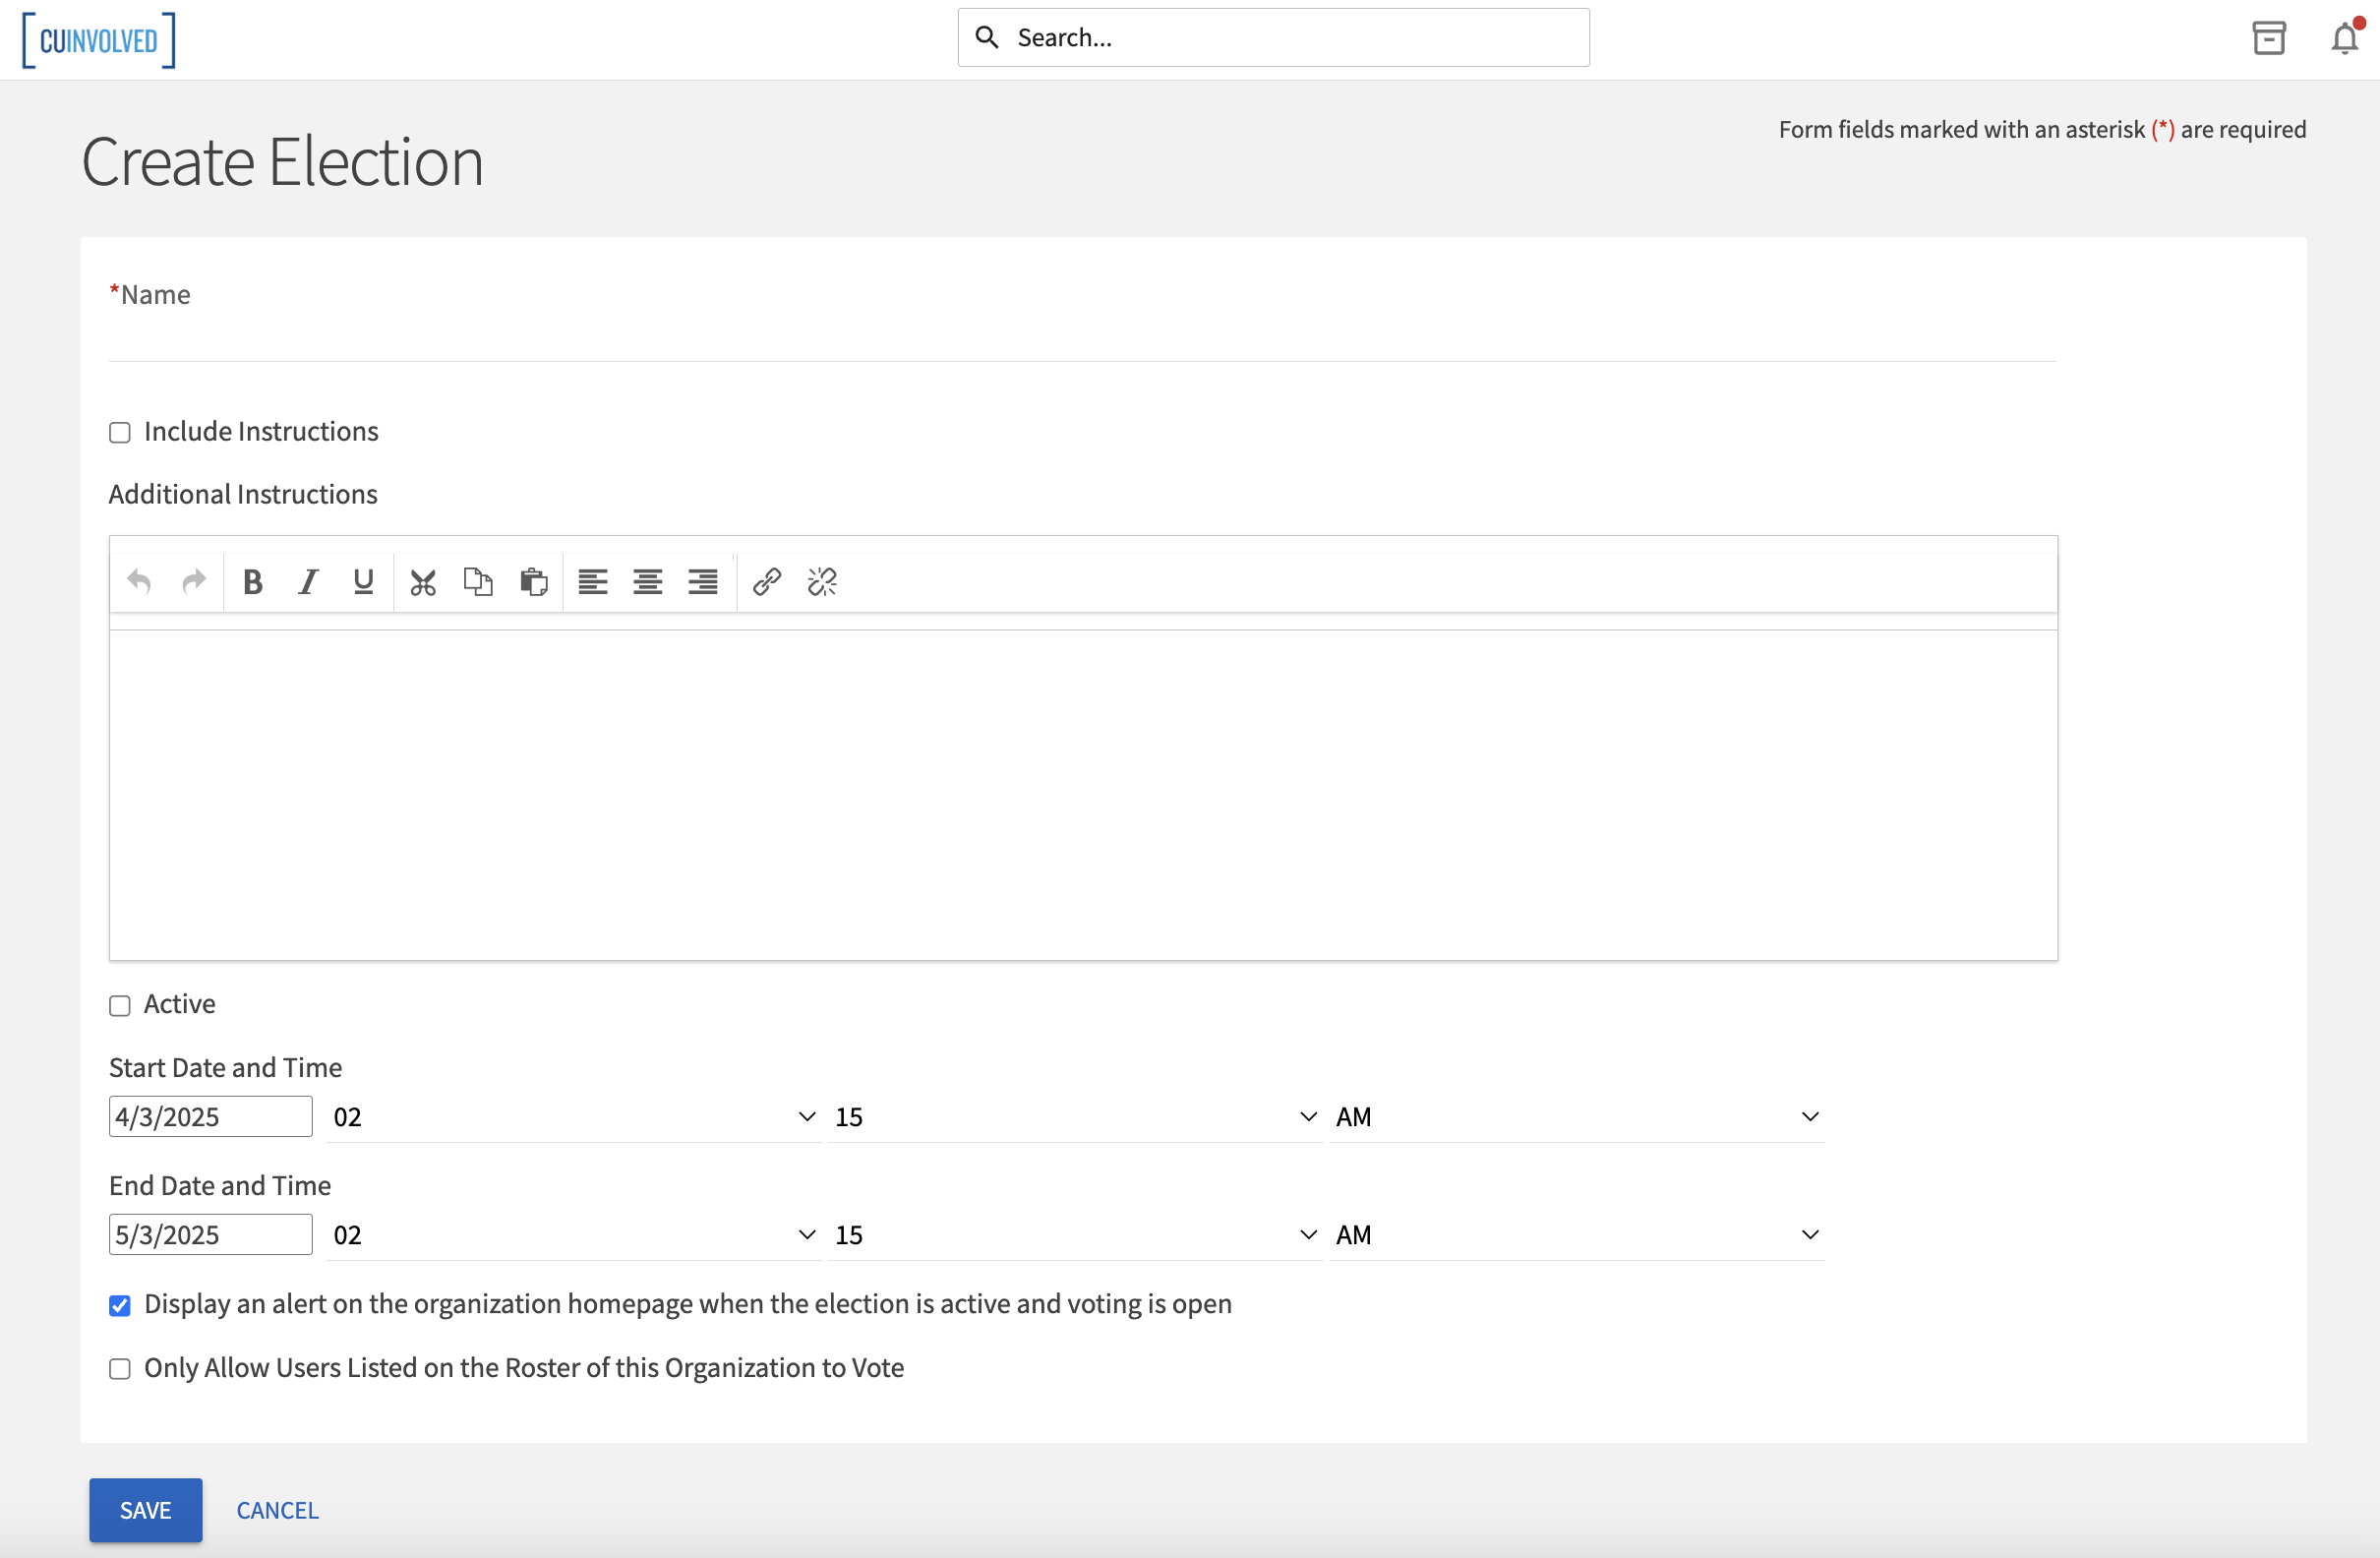
Click Create Election
Below that, you can choose if your election should be active and the date range your election should be available. When the election is set to Active and it falls within the date range, users will be allowed to access the ballot. You can also choose to display an alert on the organization homepage when the election is active and voting is open by checking the next box. The last option is whether or not to allow users outside your organization should be allowed to vote in the election-- checking the box will limit it to only users within your organization roster.
When you're finished with these settings, hit Create.
Setting up the Ballots
You can create as many ballots as needed. Each ballot can be accessible to the general user population or any number of eligibility lists. A user will see each ballot they are designated to see.
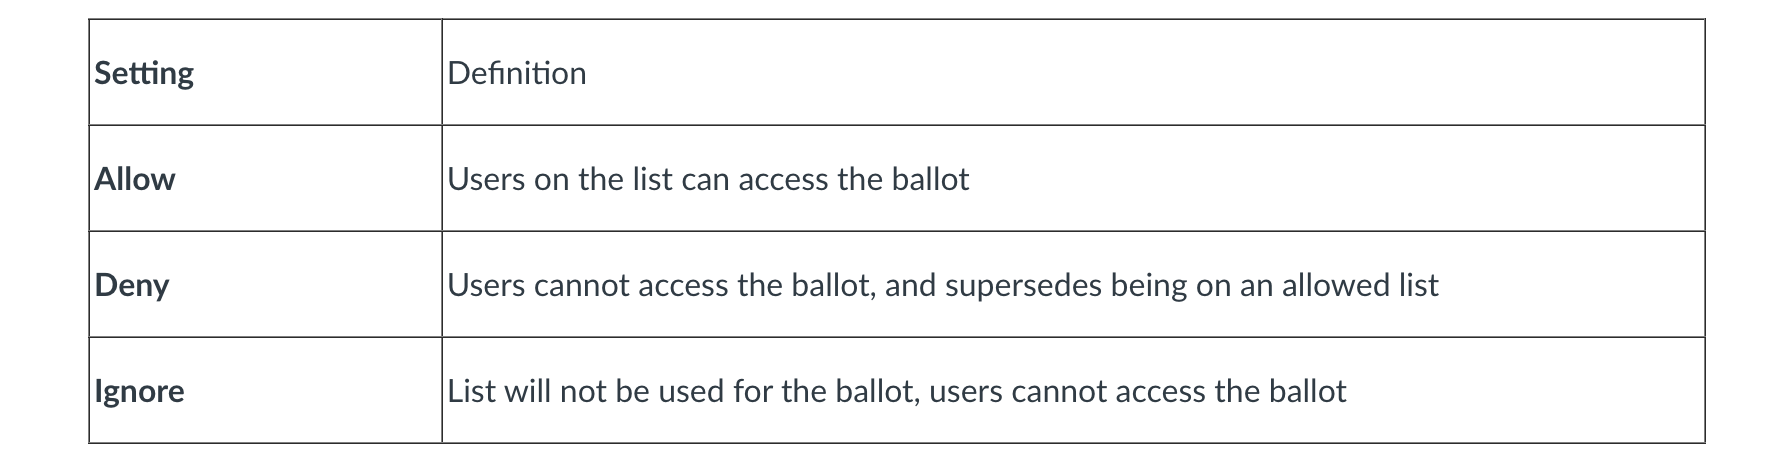
To start creating your ballots, click Create Ballot. Enter the name of your ballot, then determine if the ballot should be general access by selecting Enable or Disable. If you select Disable, you'll be prompted to enter settings for each of the available eligibility lists.
Eligibility lists are set up by campus administrators and are shared to organizations. If you are not seeing an eligibility list that you expect to see, contact clubs@creighton.edu
Once you have verified your eligible users access, click Create to advance to the next page. You'll now be taken to the form builder with a limited selection of question types. Please see Form Building for complete instructions on creating or editing questions. The builder will automatically save your progress as you create questions. At any time, you can revise the title and access of your ballot by clicking Form Properties in the upper right corner.
When you're finished, click Back to Ballots in the upper left corner. Repeat this for any additional ballots you need to create within the same election. Once all your ballots are ready, be sure to set your election to Active to ensure users can vote when the election starts and the prompt to vote will display on your organization homepage, if requested.
Sample Ballot Outline
1. Text Box:
Please list your NetID.
Your NetID is the account username that goes with your BLUE password. It will consist of three letters and five numbers and cannot be changed. The letters usually match your initials, and the numbers are randomly generated. Example: abc12345
Listing a valid NetID ensures that only those eligible to vote for this election cast a vote. Your NetID will be kept confidential, and the candidates will not be able to connect your vote to your NetID. If you do not provide a valid NetID, your vote will not be counted in the final vote.
2. Instructions Block:
Read more about the candidates below or use the "i" icons next to the corresponding candidates' names:
Candidate 1 Name
…
Candidate 2 Name
…
Candidate 3 Name
…
3. Ranking with Additional Information (i) icons:
Rank your choices for 2L Class Representative with your top pick as #1.
Candidate 1 Name (i)
Candidate 2 Name (i)
Candidate 3 Name (i)